Build a To-Do App with Supabase in Nowa 3.0

Hey builders! 👋
It’s a great time to be building and launching apps — especially with Nowa 3.0 in your hands.
This version is powered by our smartest AI agent yet, which can help you with everything from start to finish.
One of my favorite things about Nowa 3.0 is that it fully supports Supabase.
And today, I’m going to walk you through building a to-do app with login — all powered by Supabase on the backend and Nowa on the frontend.
We’ll go step by step, and I’ll show you how to:
- Set up Supabase with authentication and a secure table for your tasks.
- Connect Supabase to Nowa.
- Use AI to generate queries and UI.
- Make your app functional and ready to launch.
Let’s start with the backend setup.
1. Setting up Supabase
First, create a new project in Supabase.
For our app, we just need one table to hold tasks. Each task will:
- Belong to a specific user.
- Store the time it was created.
- Have the task text itself.
- Have a boolean to mark it as complete or not.
Supabase already gives us an auth table for users, so we’ll just add a todos table with these fields:
created_at– timestamp for when the task is createduser_id– foreign key linked toauth.users.idtask– the text of the taskis_complete– boolean for completion status
Since the table will hold all users’ tasks, we need Row Level Security (RLS) so that users can only access their own data.
Here’s the SQL you can run in the Supabase SQL editor to set it all up:
-- Create the todos table
CREATE TABLE todos (
  id uuid DEFAULT gen_random_uuid() PRIMARY KEY,
  created_at timestamptz DEFAULT now() NOT NULL,
  user_id uuid REFERENCES auth.users(id) NOT NULL,
  task text NOT NULL,
  is_complete boolean DEFAULT false NOT NULL
);

-- Enable Row Level Security (RLS) on the todos table
ALTER TABLE todos ENABLE ROW LEVEL SECURITY;

-- Create a policy to allow users to view their own todos
CREATE POLICY "Users can view their own todos." ON todos
  FOR SELECT USING (auth.uid() = user_id);

-- Create a policy to allow users to create their own todos
CREATE POLICY "Users can create their own todos." ON todos
  FOR INSERT WITH CHECK (auth.uid() = user_id);

-- Create a policy to allow users to update their own todos
CREATE POLICY "Users can update their own todos." ON todos
  FOR UPDATE USING (auth.uid() = user_id);

-- Create a policy to allow users to delete their own todos
CREATE POLICY "Users can delete their own todos." ON todos
  FOR DELETE USING (auth.uid() = user_id);

-- Create a trigger to listen for changes on the todos table for real-time updates
CREATE OR REPLACE FUNCTION public.handle_new_todo()
RETURNS TRIGGER AS $$
BEGIN
  NOTIFY todos_changes;
  RETURN new;
END;
$$ LANGUAGE plpgsql;

-- Set up the trigger to fire on INSERT, UPDATE, or DELETE
CREATE TRIGGER todo_changes_trigger
AFTER INSERT OR UPDATE OR DELETE ON todos
FOR EACH ROW EXECUTE FUNCTION public.handle_new_todo();
2. Connecting Supabase to Nowa
Alright — backend’s ready, so let’s jump into the fun part: the app itself. 🚀
Here’s how to hook Supabase into your Nowa project:
- Create a new project in Nowa.
- In Supabase, copy your URL and KEY.
- Back in Nowa, click the Supabase icon, paste those values, and hit Connect.
That’s it. You’re officially connected.
3. The default queries you get for free
The moment you connect, Nowa sets you up with three ready-to-use queries: SignIn, SignUp, and SignOut.
It also quietly adds a file called supabase_service.dart in the integrations folder.
That file is your direct line to Supabase — it’s where all the queries live and where the magic happens.
4. Testing those queries
Testing is easy:
- Select a query.
- Fill in any needed parameters.
- Click Play and watch your Supabase data change.
Here’s me testing the SignUp query by entering an email and password. The response you see is an AuthResponse — don’t worry about the tech details, it just means the signup worked.
Check your Supabase auth table, and boom — the new user is there.
Heads up: Supabase will send a verification email. Make sure to click that link or you won’t be able to sign in.
5. Generating a query with AI
This is where Nowa’s AI agent really shines.
You can make queries in two ways:
- Let AI do it for you.
- Or paste the SQL/code yourself.
In the example below, I asked it to “generate a query to add a task for a user” — and it instantly created it, complete with the right query type. You don’t even need to tell it your table names or column types — it already knows.
One thing: To test this “Add Task” query, you’ll need to be signed in first. More on that in a bit.
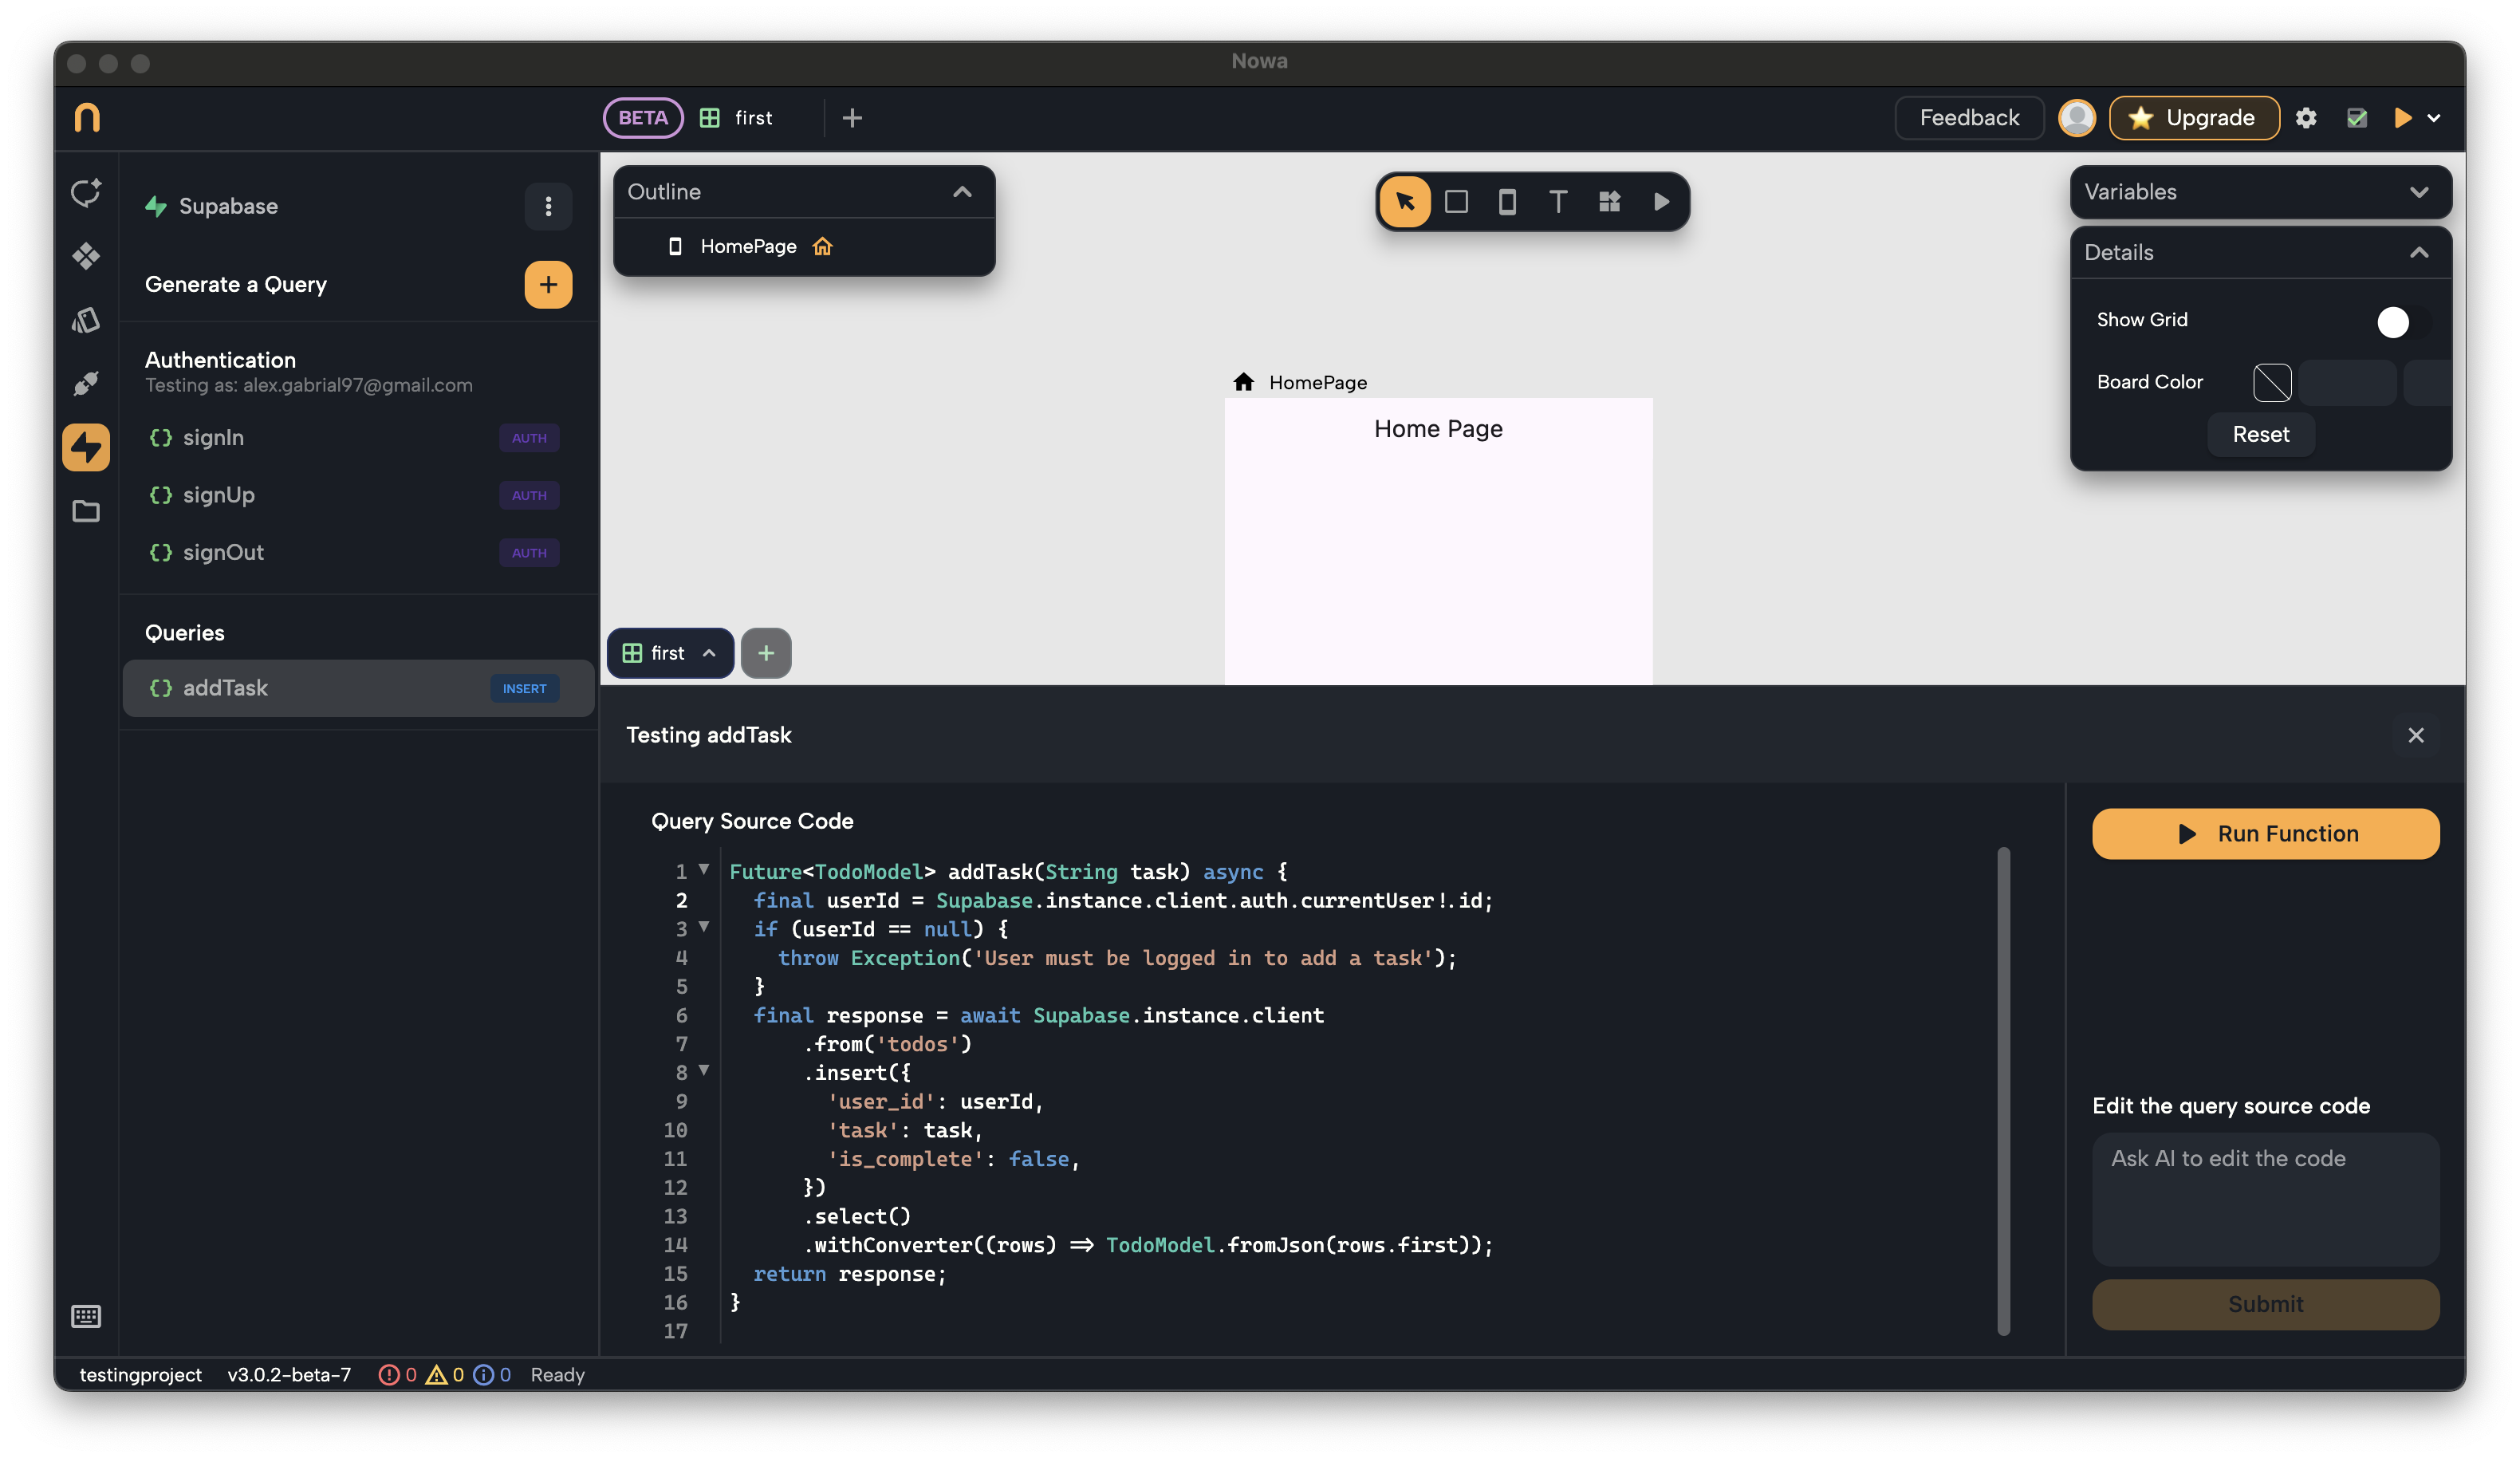
6. Tweaking the query code
Want to peek under the hood?
Click Edit code in the testing panel to see and tweak the query.
You can also go straight to supabase_service.dart in the file panel and edit it there.
7. Signing in for testing
Some queries won’t work unless you’re logged in.
Here’s the trick: just run the SignIn query. Once you do, you’ll see “Testing as…” in the panel — meaning every query that needs a user will use that account.
This is also handy if you want to test screens without starting from the login page every time.
Here’s how it looks:
8. Adding a task
Now that we’re signed in, let’s try the Add Task query.
Run it, and in Supabase you’ll see the new task with the exact created_at, user_id, and is_complete values.
9. Generating multiple queries in one go
Why stop at one query? You can ask the AI to make several at once.
In the example below, I told it to create queries for:
- Updating a task name
- Marking a task as done
- Deleting a task
All from a single prompt.
10. Testing an update query
Let’s test one — updating a task name. I grabbed the task ID from earlier, typed in the new name, and ran it.
Supabase updated instantly. ✅
11. Creating a login screen with AI
Time to bring the app to life.
I opened the AI agent, attached the SupabaseService (so it has full context), and asked for a login screen using Supabase.
It even threw in a home page for the to-do app — both looking modern and clean right from the start.
12. Making the home page functional
The home page was just a mockup, so I told the agent to make it functional using my Supabase queries — add, edit, delete, mark as done.
Since it already had the service file, it hooked everything up.
Playing the app now updates Supabase in real time.
If you see a red error in the builder, just run the screen — it needs real user data.
13. Final tips
- Click the three dots in the Supabase panel to see your tables, disconnect, or change keys.
- Already signed in? You can run any screen mid-flow without going through login.
- Give the AI plenty of context — it’ll save time and make your results even better.
And that’s it! 🎉
You now have a fully working to-do app with using only Nowa 3.0 + Supabase.
If you end up building something cool with this setup, send it over to team@nowa.dev — we love showing off what our builders are creating.
Next up, we’re talking APIs. Stay tuned.